


Recent Posts


DIY Valentines Cards: How to Make Stunning Dip-Dyed Designs
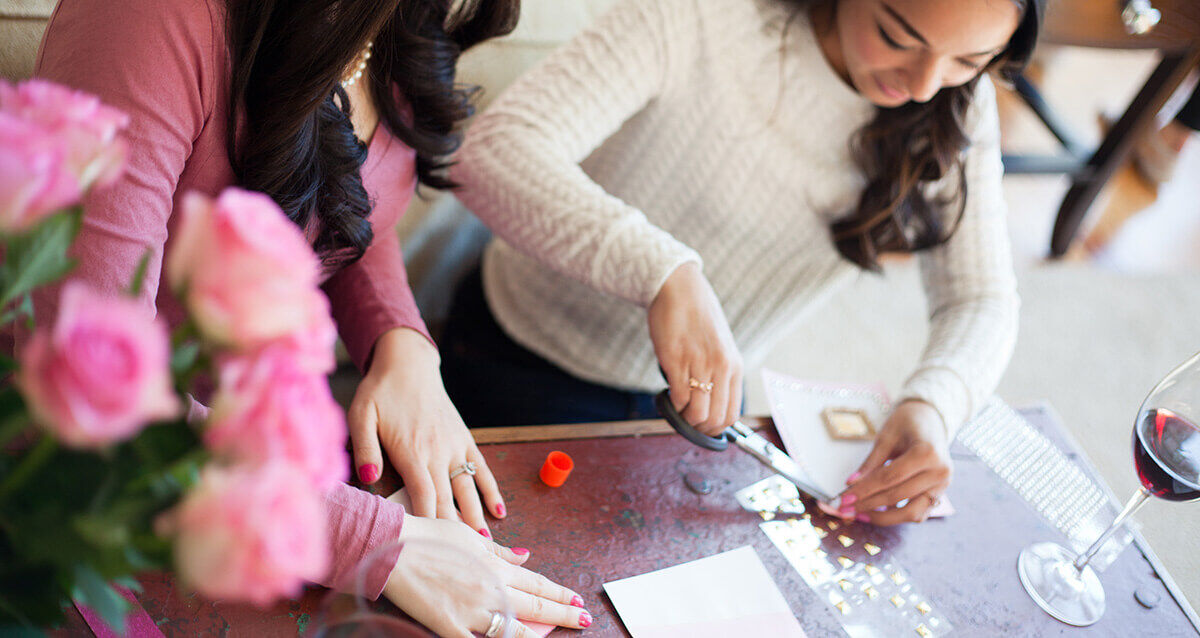
I've always loved making my own valentines, even as an adult. I even orchestrated a Make-Your-Own Valentine party at my old office a couple of years ago! Usually they were simple, made out of construction paper with a handwritten note inside, but this year I decided to make them a little more luxe with cardstock paper, lots of gold details, and a quick dip in some food coloring to create an ombre effect.
If you’re looking for Valentine's Day card ideas that go beyond the usual store-bought options, making handmade Valentine cards is the way to go. Not only do they feel more personal and thoughtful, but they also give you the creative freedom to make something truly unique. Whether you want a minimalist design with delicate gold accents or a bold, colorful ombre effect, crafting your own valentines lets you put a little extra love into every detail. Scroll down for a full tutorial!

 Supplies:


Supplies:
- Card stock (I used shades of white and pink)
- Glue and/or tape
- Food coloring (to create pink on the paper, I used red)
- Large bowl for dip-dyeing
- Paper towels
- Stickers, paint, pens--anything you want to decorate the valentines with after dip-dyeing
- In a large bowl, mix one cup of water and 15-20 drops of food coloring (you can adjust this to get a lighter or darker shade of pink).
- Lay out some paper towels near your dip-dyeing station.
- Dip the cardstock into the water one piece at a time. You can dip one corner, half of the paper, or even each corner to create a border--get creative! Shake it off and let excess liquid drip off before you set each piece on the paper towel to dry.
- To create an ombre effect, let the paper dry and then add more food coloring to the water. Re-dip less of the paper this time. Repeat as necessary/desired.
- Once the paper is thoroughly dried (about fifteen to twenty minutes), place under a heavy book to flatten. This is optional but I like to do steps 1-5 the night before and let the paper flatten out overnight.
- Fold and decorate your valentines--we used gold studs, sparkly stones, stickers, fancy paper for the inside of the cards, and even a mini mirror! To create a professional look we stuck with same color scheme throughout, but you could make them however you like. Enjoy!
Creative Ideas to Personalize Your DIY Valentines Cards
Want to make your Valentine's Day card even more unique? Here are a few creative ideas to take your cards to the next level:- Pressed Flowers – A tiny dried flower adds a romantic, vintage touch.
- Handwritten Love Notes – Whether it’s a heartfelt message or a funny inside joke, a handwritten touch makes all the difference.
- Gold Leaf Accents – A little shimmer never hurts! A touch of gold foil or metallic paint can make your cards feel extra luxe.
- Ribbon & Fabric Scraps – Add a bit of texture with soft velvet ribbon or lace for a dreamy effect.
Pairing Your Crafting Session with the Perfect Wine
When you are working on something that will brighten someone’s Valentine’s Day, it is always appropriate to do it with a glass of wine. La Crema’s Monterey Pinot Noir is a great pairing with this craft, because Pinot Noir may be the ultimate Valentine’s Day wine.Final Touches & How to Gift Your Handmade Cards
Once your dip-dyed valentines have dried and been decorated to perfection, it’s time to give them away! A thoughtful presentation can make your handmade Valentine’s Day cards feel even more special. Pair your card with a bottle of wine—La Crema offers a wide selection of Pinot Noir that are a perfect choice—to create a romantic and elegant gift. If you’re giving a valentine to a friend or family member, consider adding a small box of chocolates or a handwritten note inside to make it even more meaningful. For a charming, classic touch, tuck your card into a bouquet of fresh flowers, wrap it in twine with a sprig of dried lavender, or place it in a decorative envelope sealed with a wax stamp. If you’re mailing your valentines, add a sprinkle of confetti or a pressed flower inside for a delightful surprise. However you choose to present them, the time and love you put into crafting these cards will make them cherished keepsakes for the people who receive them.
Photos by Sarah Gatrell of Photo + Love.